Looking for help?
Find answers to your questions
RGB Wiring HOW-TO Guide
This explains the KnightDriveTV sleepy eye RGB Tripleds installation wiring guide. Follow these steps EXACTLY or BLOWN headlight fuses will result! ***APP used for RGB's is at the bottom of this page ***
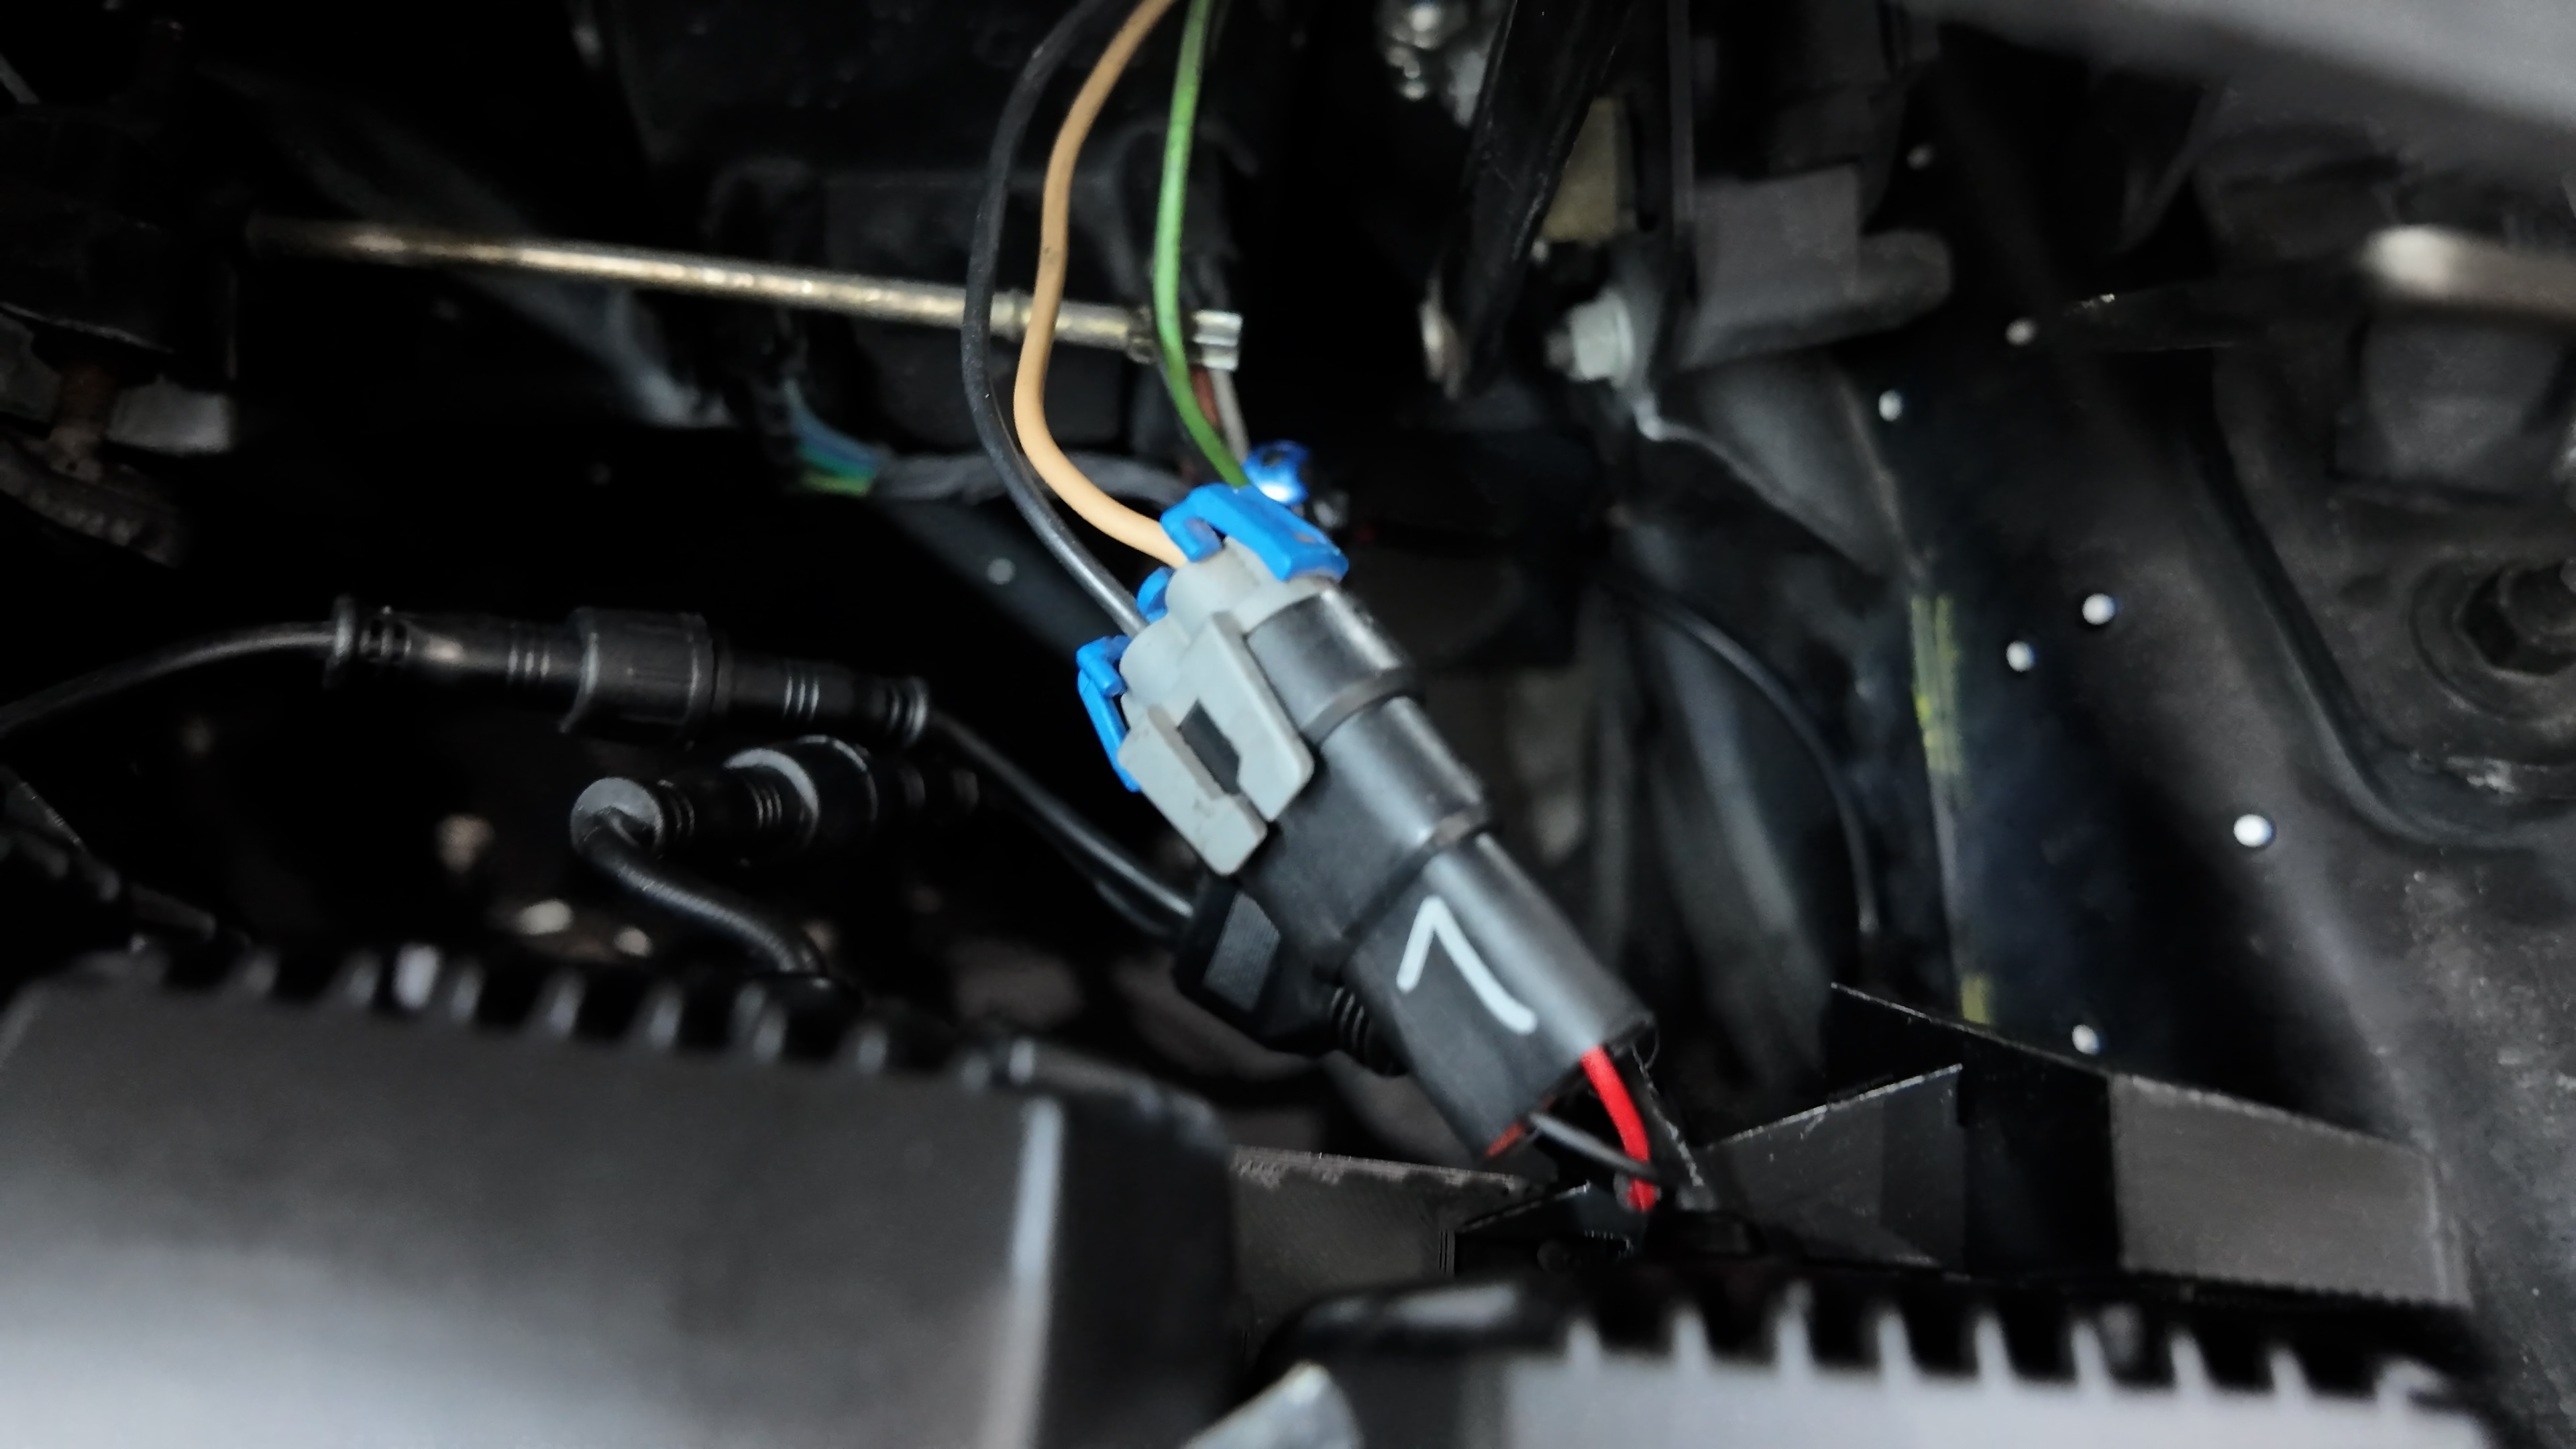
Step 1 - BE SURE to plug in the headlight main beams first and test for function. C5's have a variation in which side the power and ground is, on each side of the plug. BE sure to mark which is low beam and which is high beam. Our kit often has an L marked on the plug for low beam. The easiest method is to be sure the black wire on our plug, aligns with the black wire on the GM plug (car side). See this photo, our red wire (voltage positive) is aligned with the C5 colored wire and the black is aligned with black. The locking tab does NOT indicate alignment and in some cases, a zip tie may be needed to secure the plug. See photo indicating how your black wires should align.

Step 2 - Verify all main beams work. Remove plastic protective film during this process, as the main beams can melt the plastic. Be aware that the headlight doors may move also, so be sure the lights are free and clear or secured, during testing. ONLY move forward once the MAIN BEAMS light correctly. 2 outers on each side for low beam. All 6 will light on high IF the relay is installed. If the relay isn't installed yet, only one inner main beam on each side will light with high beam. As long as this all happens correctly, move to wiring the RGB controller.
Step 3 - The RGB controller will need to be secured in the center of the car, and the small white plug that has 4 wires, will need extended. You'll be extending these wires to reach the passenger side of the car, in the headlight area.
Step 4 - The red wire can be connected to the lower parking light bulbs brown wire, with the black wire from the rgb controller to the black wire on the parking light bulb.
Step 4 - ALL your RGB controller connections can tap into these wires.
RGB controller Black to (black) ground on lower parking light bulb
RGB controller Red to the (Brown) wire on parking light bulb
RGB controller white (should activate your right turn signal) needs extended toward rear of car for turn signal function.
RGB controller blue (should activate left) needs extended to rear of car for turn signal power
This will allow your RGB's to activate with the parking lights. If you desire to have RGB's light with the rest of the car OFF, then an advanced wiring configuration with a relay, will be needed.
Tapping into the existing wires could be done a number of ways, using T-Taps or partially stripping away insulation, wrapping in the new wire to make a good connection, etc.
APP CONTROL
App used for each application listed below. You can also search "LED LAMP" in your application search. The icon for the application (while KnightDriveTV app is being developed) is below.
Mac/Apple IOS app
Android App
App should have an icon that appears like this:
Step 1 - Once you've downloaded the app you will click + to add device, while your halos are activated.
Step 2 - LED-DMX is the appropriate tab
Step 3 - Some apps will further require you to select LED-001
Experiment with different tabs but your main screen should appear like the one below. The on/off is on the upper right (circle with a vertical line). You can see if you're connected by toggling the on/off or changing colors around.
SMOKED Sequential C5 Corners on clearance!
Don't miss out on the newest corners for C5, at the absolute lowest price on the internet! Only 7 sets left! Under 200 shipped!
Age verification
By clicking enter you are verifying that you are old enough to consume alcohol.
